Choose your own slide adventure
I got bored of presentations that just drone on and on about something that barely interests me. I wanted something more interactive.
I’m well aware about Prezi and slido, but they both lack certain features I needed and are also not free.
I believe in open source, and I believe in helping humanity go further and be more successful. So what did I create?
Choose your own adventure, but with slides
I love Choose your own adventure books. I grew up on Ian Livingstone and Steve Jackson’s adventures. These books were everything to me. They got me into TTRPGs and the rest of the world.
My gripe with the present presentations is that no matter how amazing the material might be, my ADHD brain will just shut off mid presentation from time to time. Especially if I have been in presentations all day.
An interactive presentation where the viewers decide how the presentation continues. Based on votes, a different path is taken. But more importantly, it can go back. Meaning, if you explored a path, you can go back and explore another path.
All this with a nice pixel art CSS so you can enjoy it like a game.
And thus, I present to you: adventure-voter.
Adventure Voter
Adventure voter is an interactive slides serving single binary platform that is designed to be deployed via a reverse proxy setup.
It’s a server that serves your slides.
Markdown Slides
My other gripe was that I don’t care about fancy slide construction UIs. I just wanted to use Markdown. Now you can. Just write your story in markdown. Tie them together with IDs and tadam. You have your adventure.
Here is an example:
You have an index.yaml file like this:
# Adventure Voter Story Index
# This file defines the starting point for the adventure.
# The story graph is automatically built by scanning the markdown files in the chapters directory.

start: intro
And your first story yaml like this:
---
id: intro
type: story
next: certificate-choice
---

# Kubernetes The Hard Way

Welcome to this interactive journey through deploying Kubernetes from scratch. We're going to build a production-ready cluster without using any automated tools.

This is based on Kelsey Hightower's famous guide, but with a twist: you'll vote on the decisions we make along the way. Some paths lead to success, others to spectacular failures.

Let's see if the crowd can configure Kubernetes correctly!
This is a decision:
---
id: etcd-choice
type: decision
timer: 30
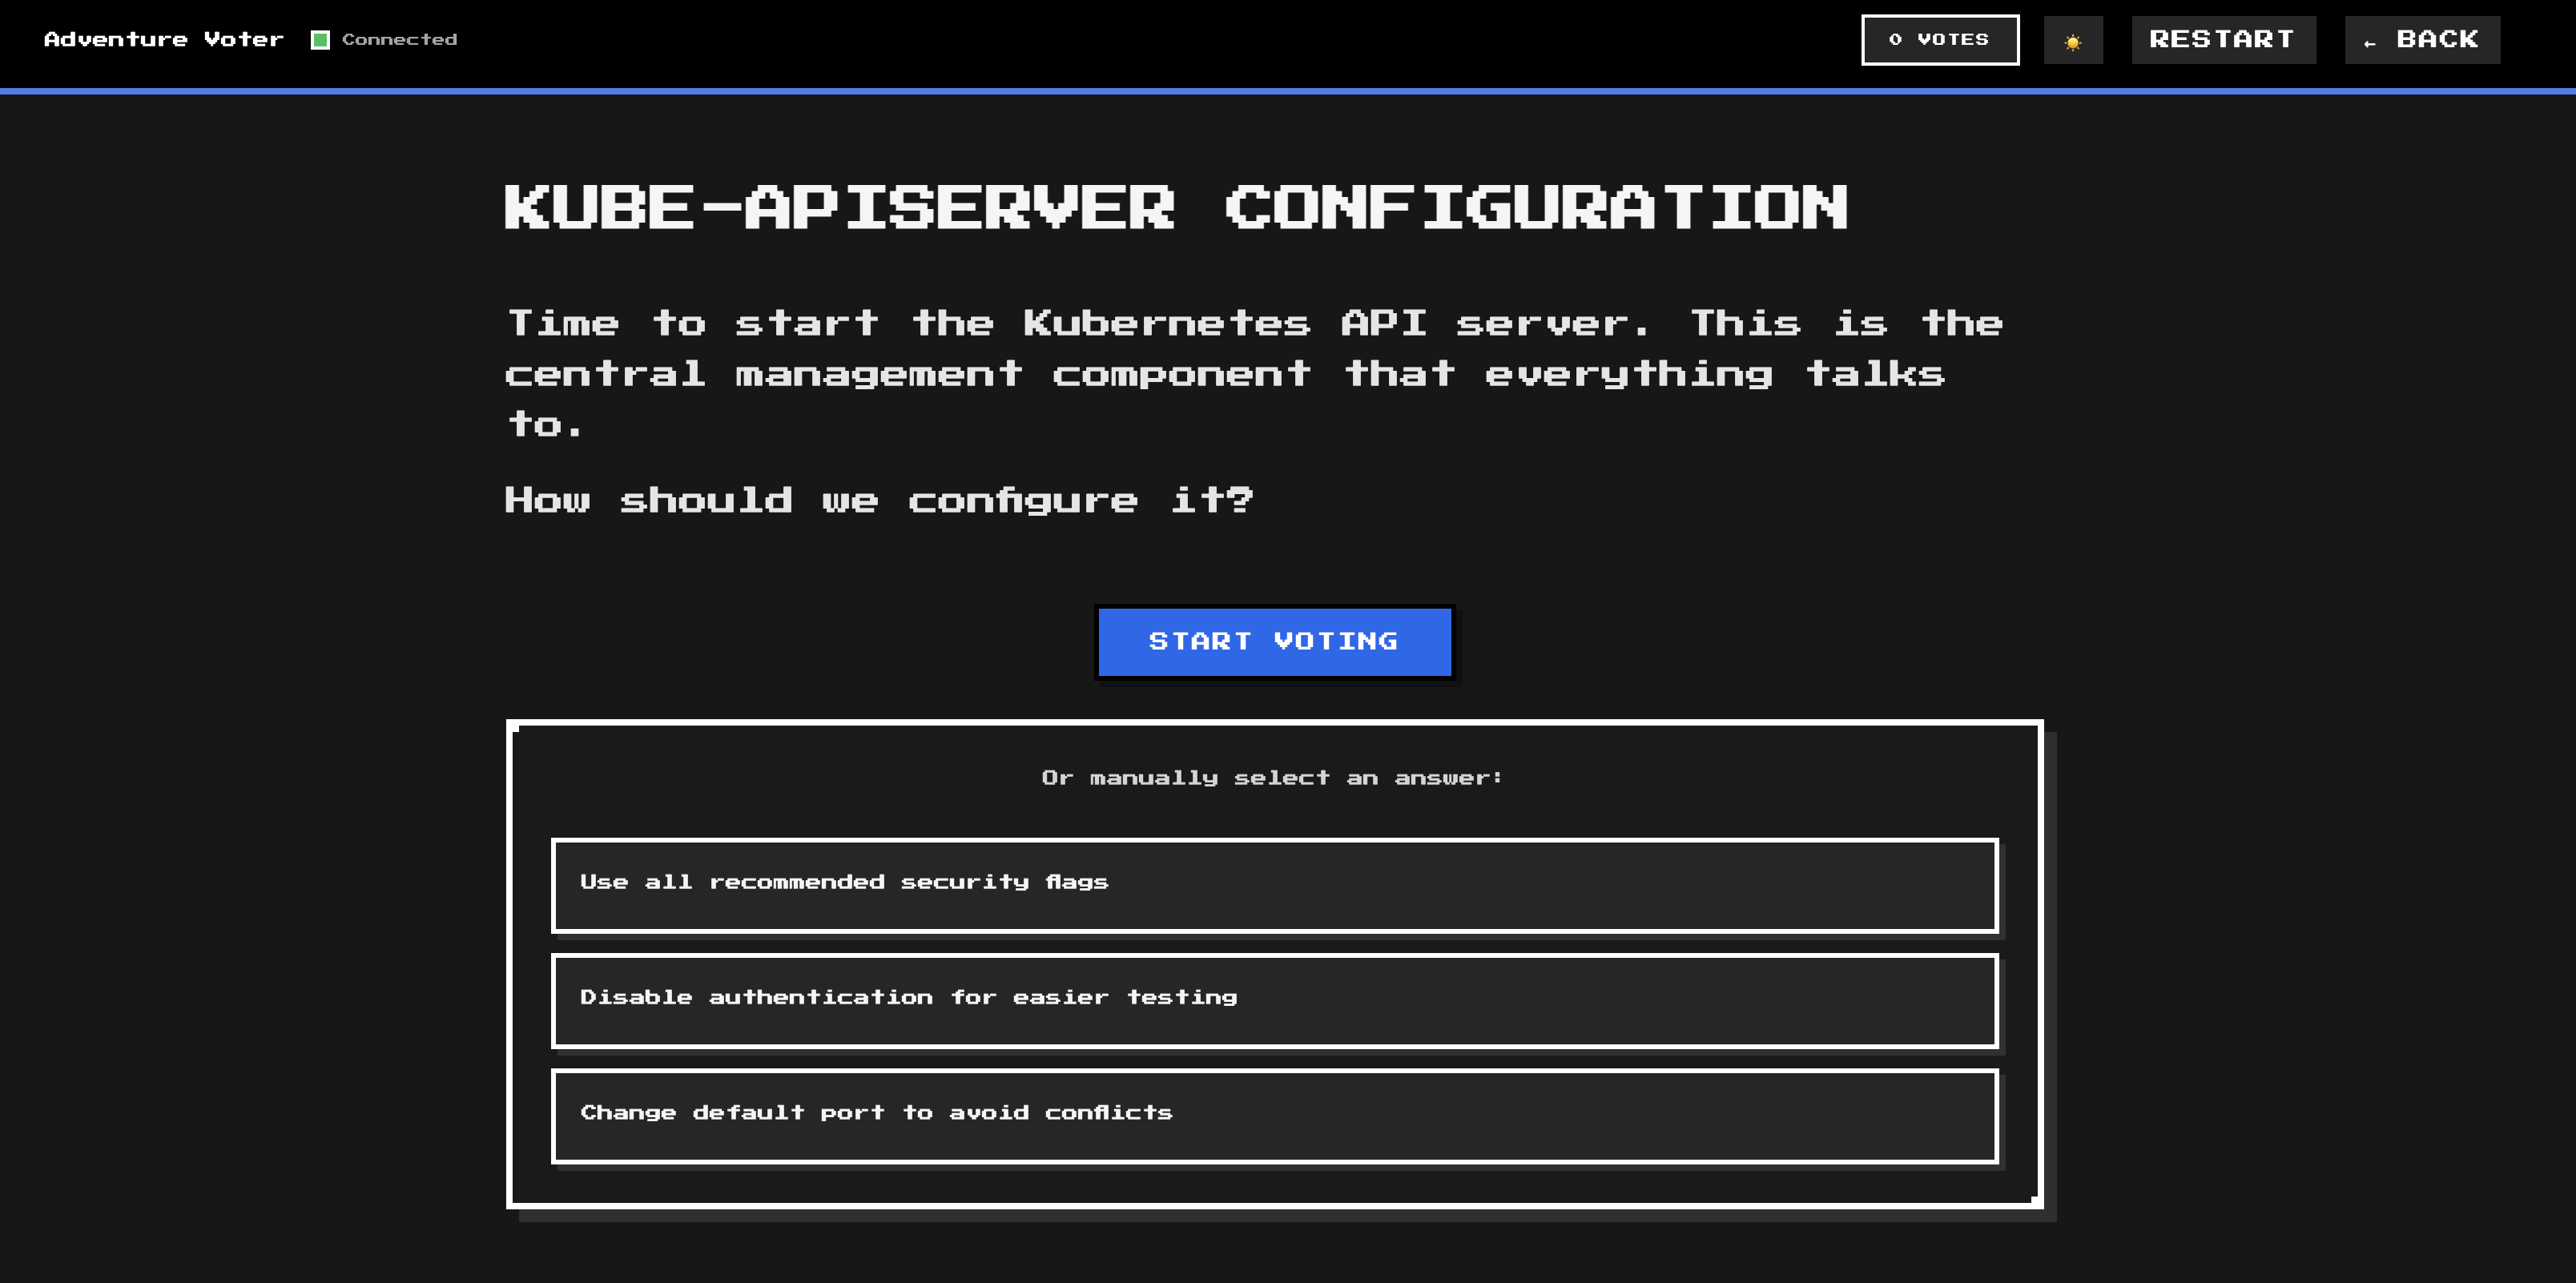
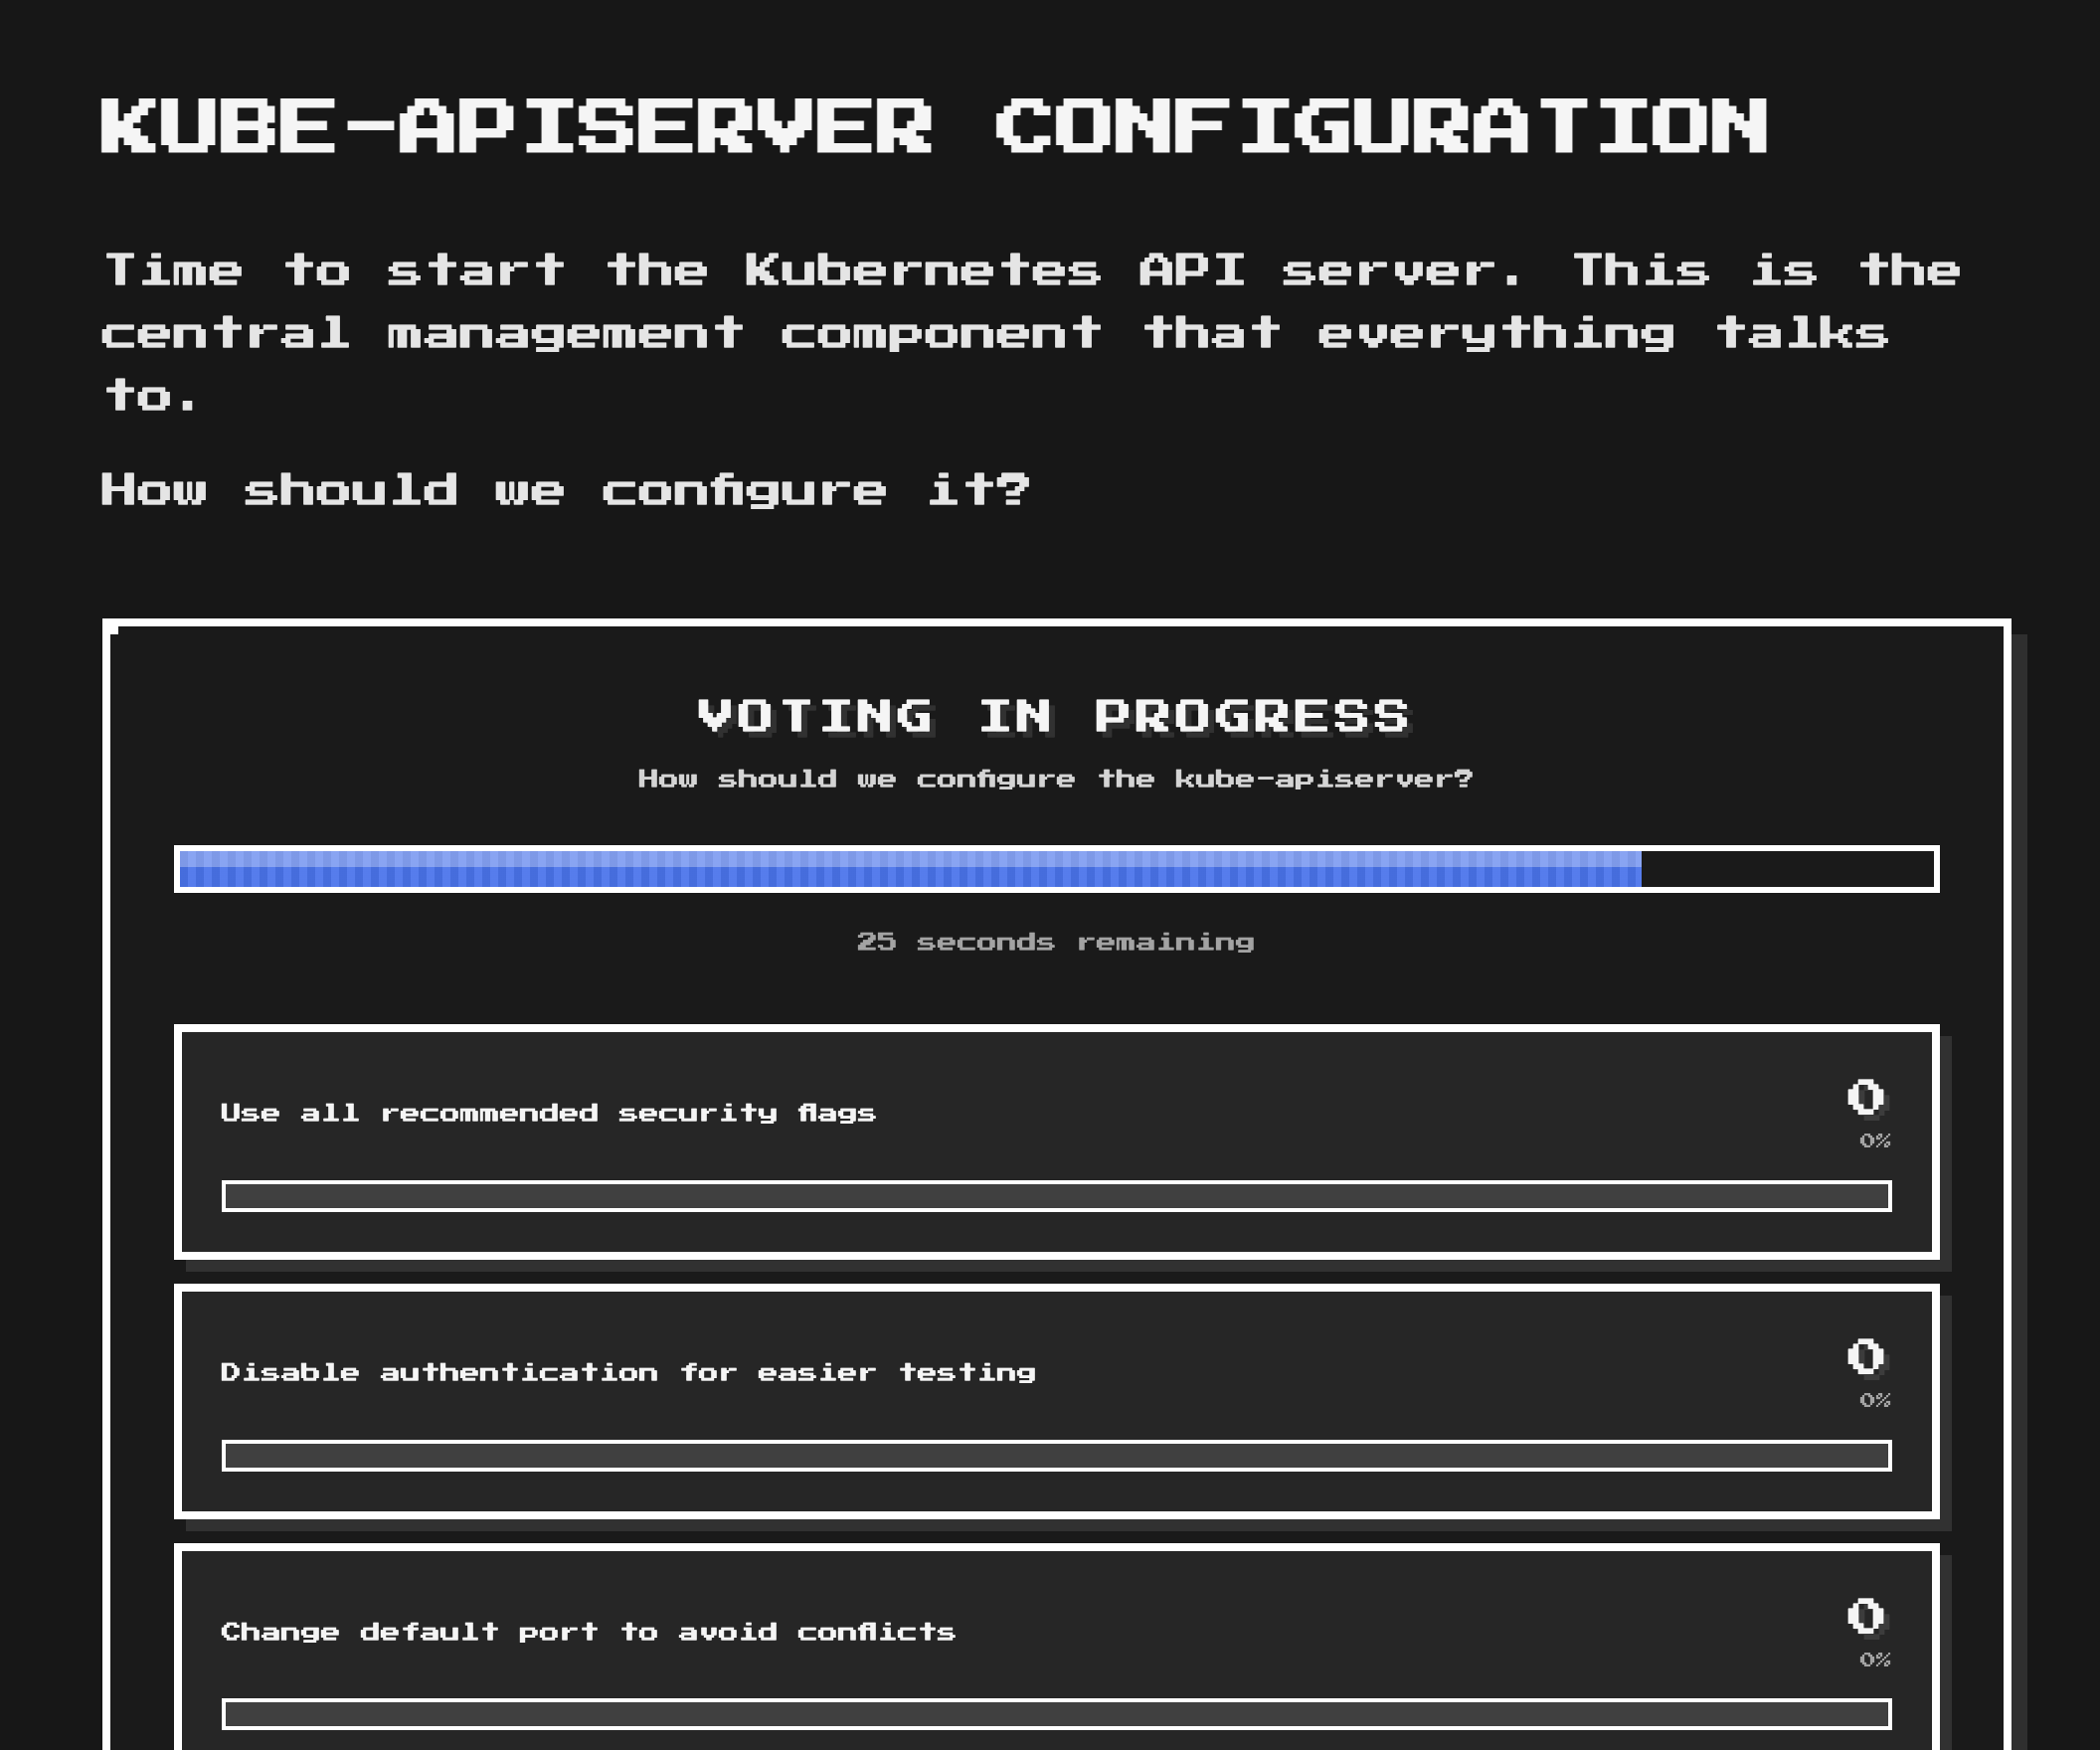
question: How should we configure etcd?
choices:
- id: three-node
label: Three-node etcd cluster with proper TLS
next: etcd-success
- id: single-node
label: Single etcd instance (faster setup)
next: etcd-warning
- id: memory
label: Run etcd in memory for performance
next: etcd-disaster
---
# etcd Configuration
With certificates ready, we need to set up etcd, Kubernetes' distributed key-value store. How should we configure it?
This is a dead end:
---
id: openssl-fail
type: game-over
---

# Certificate Problems

Using a quick openssl script seemed efficient, but...

```bash
openssl req -x509 -newkey rsa:2048 -nodes -out cert.pem
```

The certificates work initially, but you forgot to set the Subject Alternative Names (SANs) correctly. The kube-apiserver refuses connections:

```
x509: certificate is valid for localhost, not kubernetes.default
```

Your kubelet can't talk to the API server. Pod scheduling fails. Everything breaks.

This is why Kelsey recommends cfssl. You've learned the hard way why certificate configuration matters.

**Cluster Status: FAILED**
And this is the end of the story:
---
id: final-success
type: terminal
---

# Kubernetes The Hard Way - Complete!
And that’s it.
Showcase
The design uses pixelactui.
Main screen:

Voter:

Question:
Voting in-progress:
Conclusion
That’s it. It’s convenient, free, and no-one asks you to register. You would simply display a URL or a QR code where your audience would navigate to and they can begin voting as soon as a question appears on their phone.
It’s that easy.
To read more about it, and how to use it and create a story, please go to the github page.
Thanks, Gergely.