How to contribute to a new repository
Hello Dear readers.
Today, I’m going to walk you through a process of contributing into a new repository. If you are new to Go development and would like to contribute somewhere but are at a loss in large repositories, this post will be for you.
I selected the top repository in trending Go today. Which is istio. I think that’s sufficiently large and I have no idea about the repository, so I’m going to walk you through my process. I did choose a repo that is in the area of my expertise though so I have an easier time deciphering what it is trying to do in the first place.
That is a good place to start at. Look for an area that you have at least a tiny bit of a clue about. Or if the area is completely dark for you, read up on it first. In case of istio, that would probably be Envoy and Kubernetes and a bit of networking.
Notes
As mentioned in this post, I take notes about a repository in my notebook when I first encounter it. Well, how does this look like exactly?
General Overview
Once I located a project, I start taking it apart. Reading any docs, taking notes and drawing conclusions about what it does and why it’s existence is warranted. This looks like this:
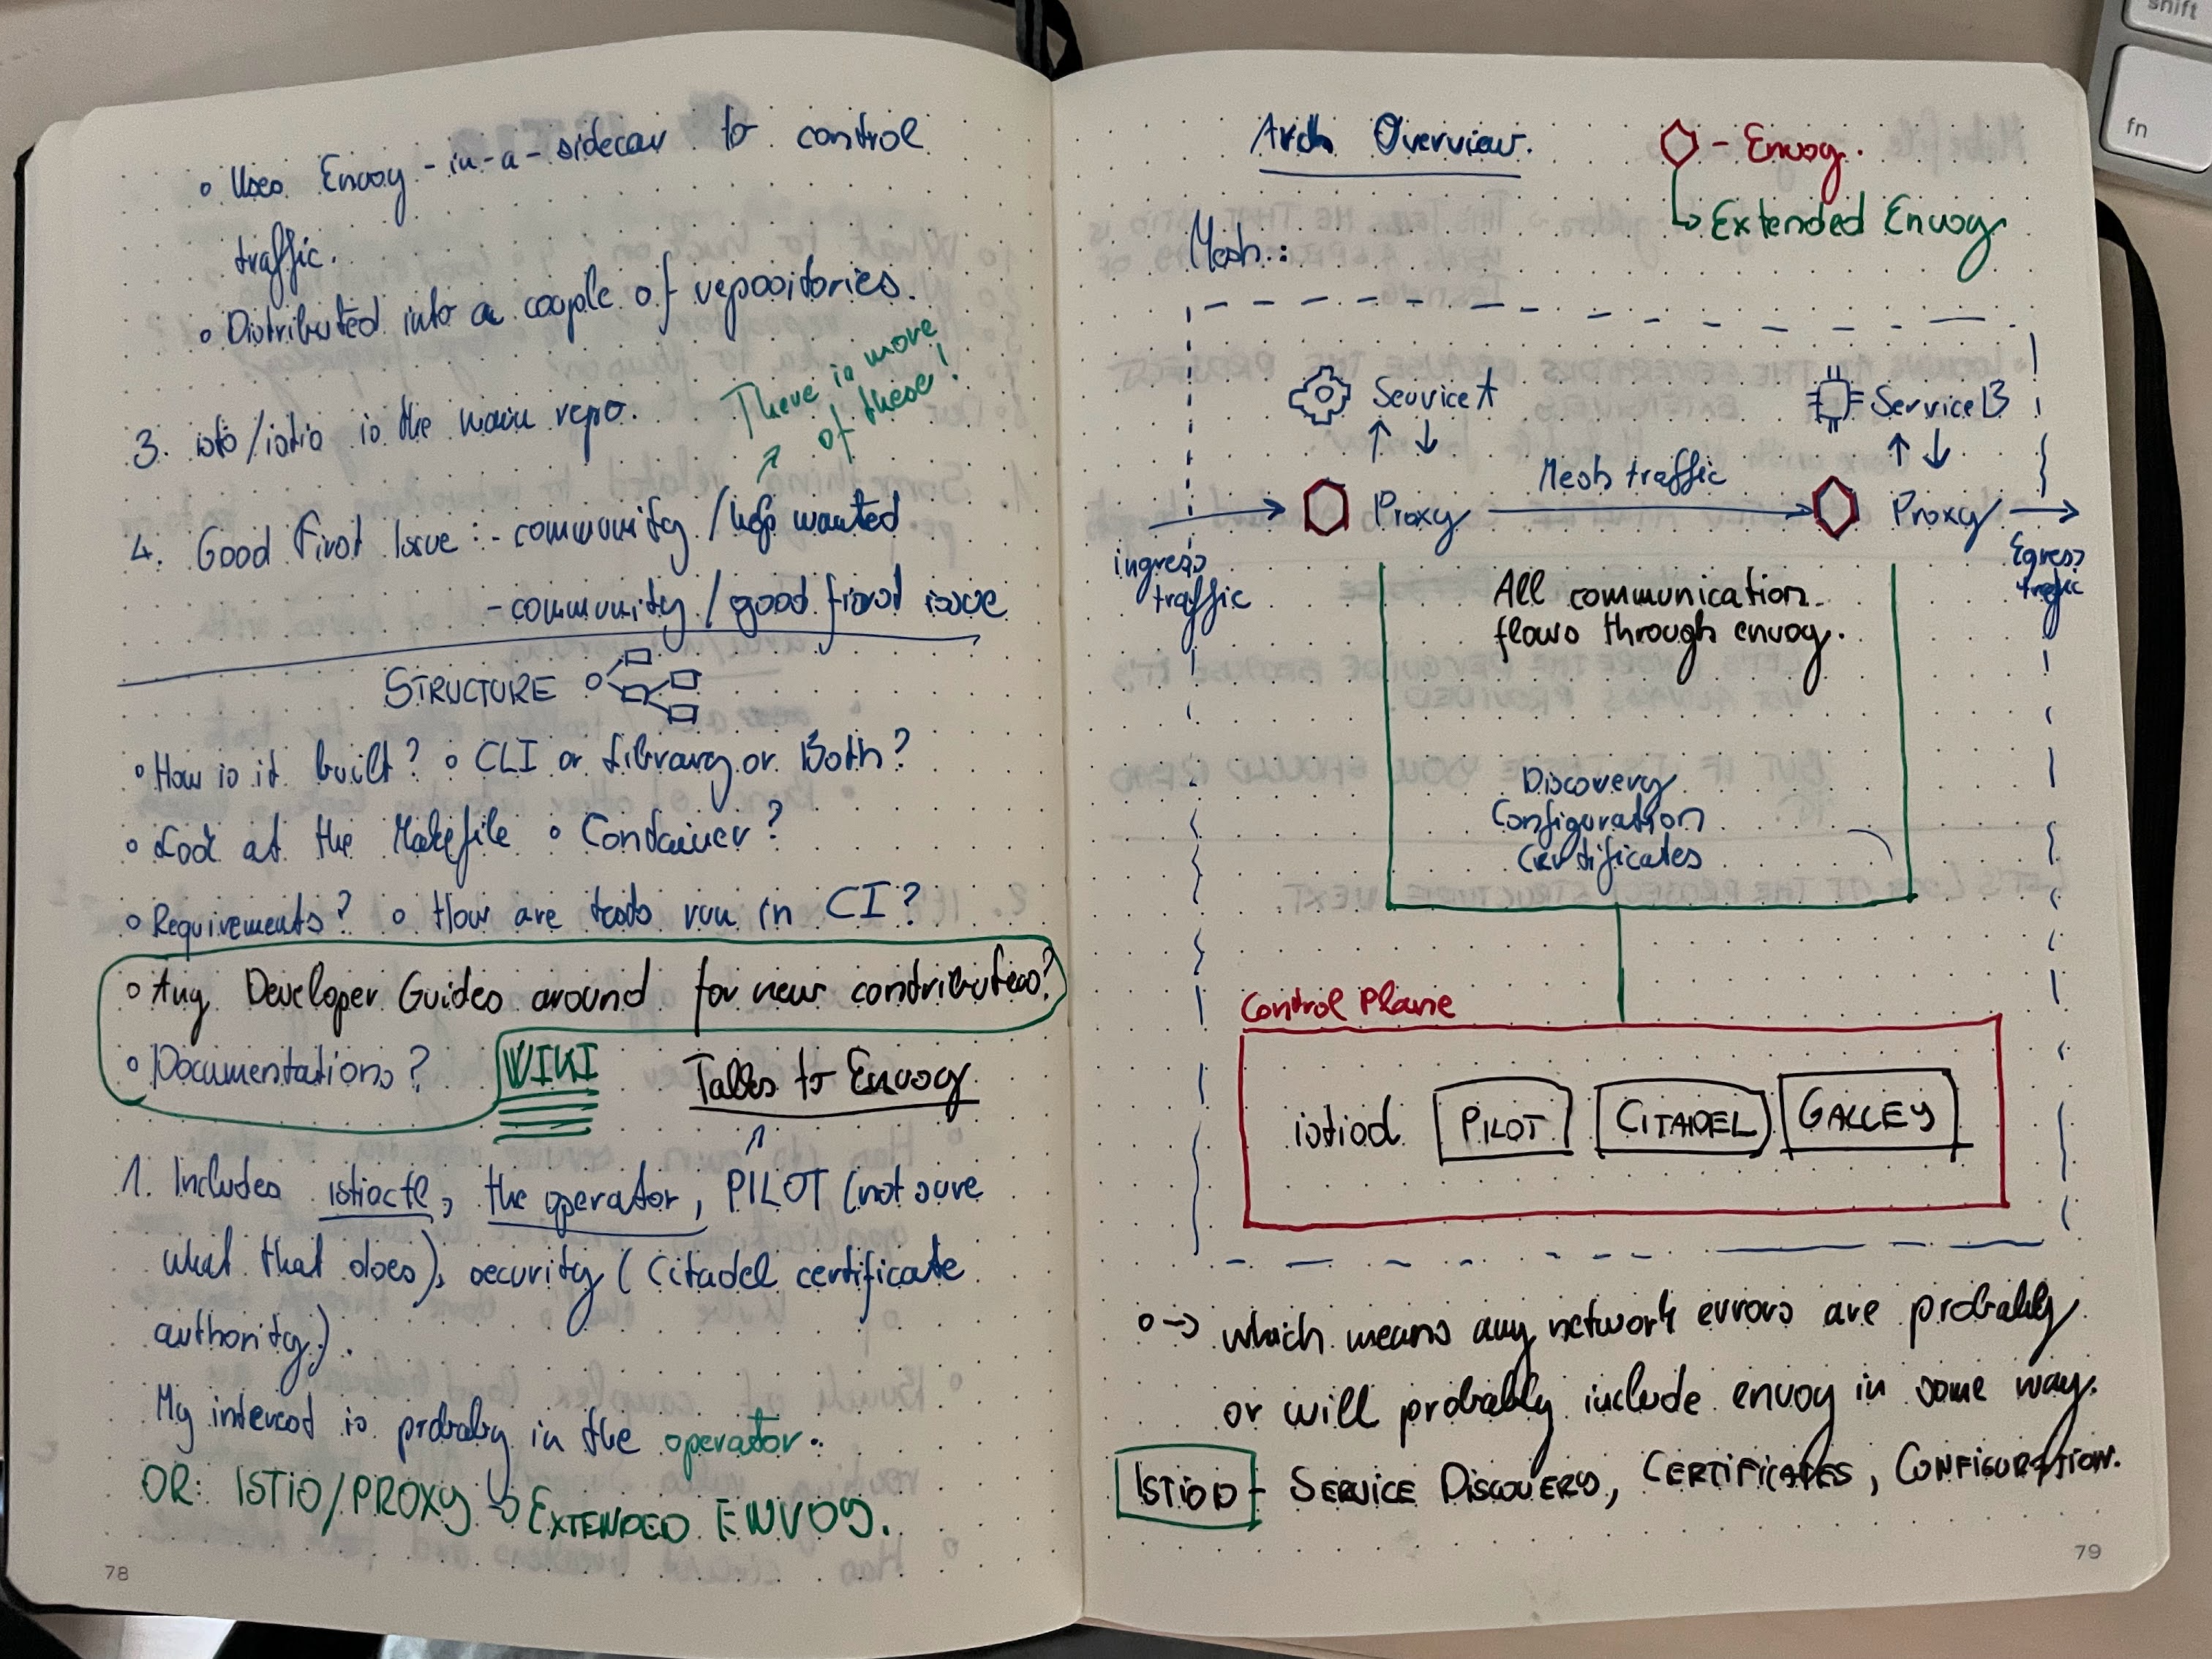
We can see here I took some notes about what Istio does and hand drawn some images that they have. Why did I copy that? Because it helps me to understand the image better. Writing it all down and drawing it by hand helps me internalise it.
Repository
Next, I try to analyze what kind of repository I’m dealing with. CLI, Library, some kind of backend service, operator, server etc. Once I have a general understanding of what I’m dealing with, I inspect each and every folder individually and take notes about what they do at a high level and possible connections to other folders. This looks like this:
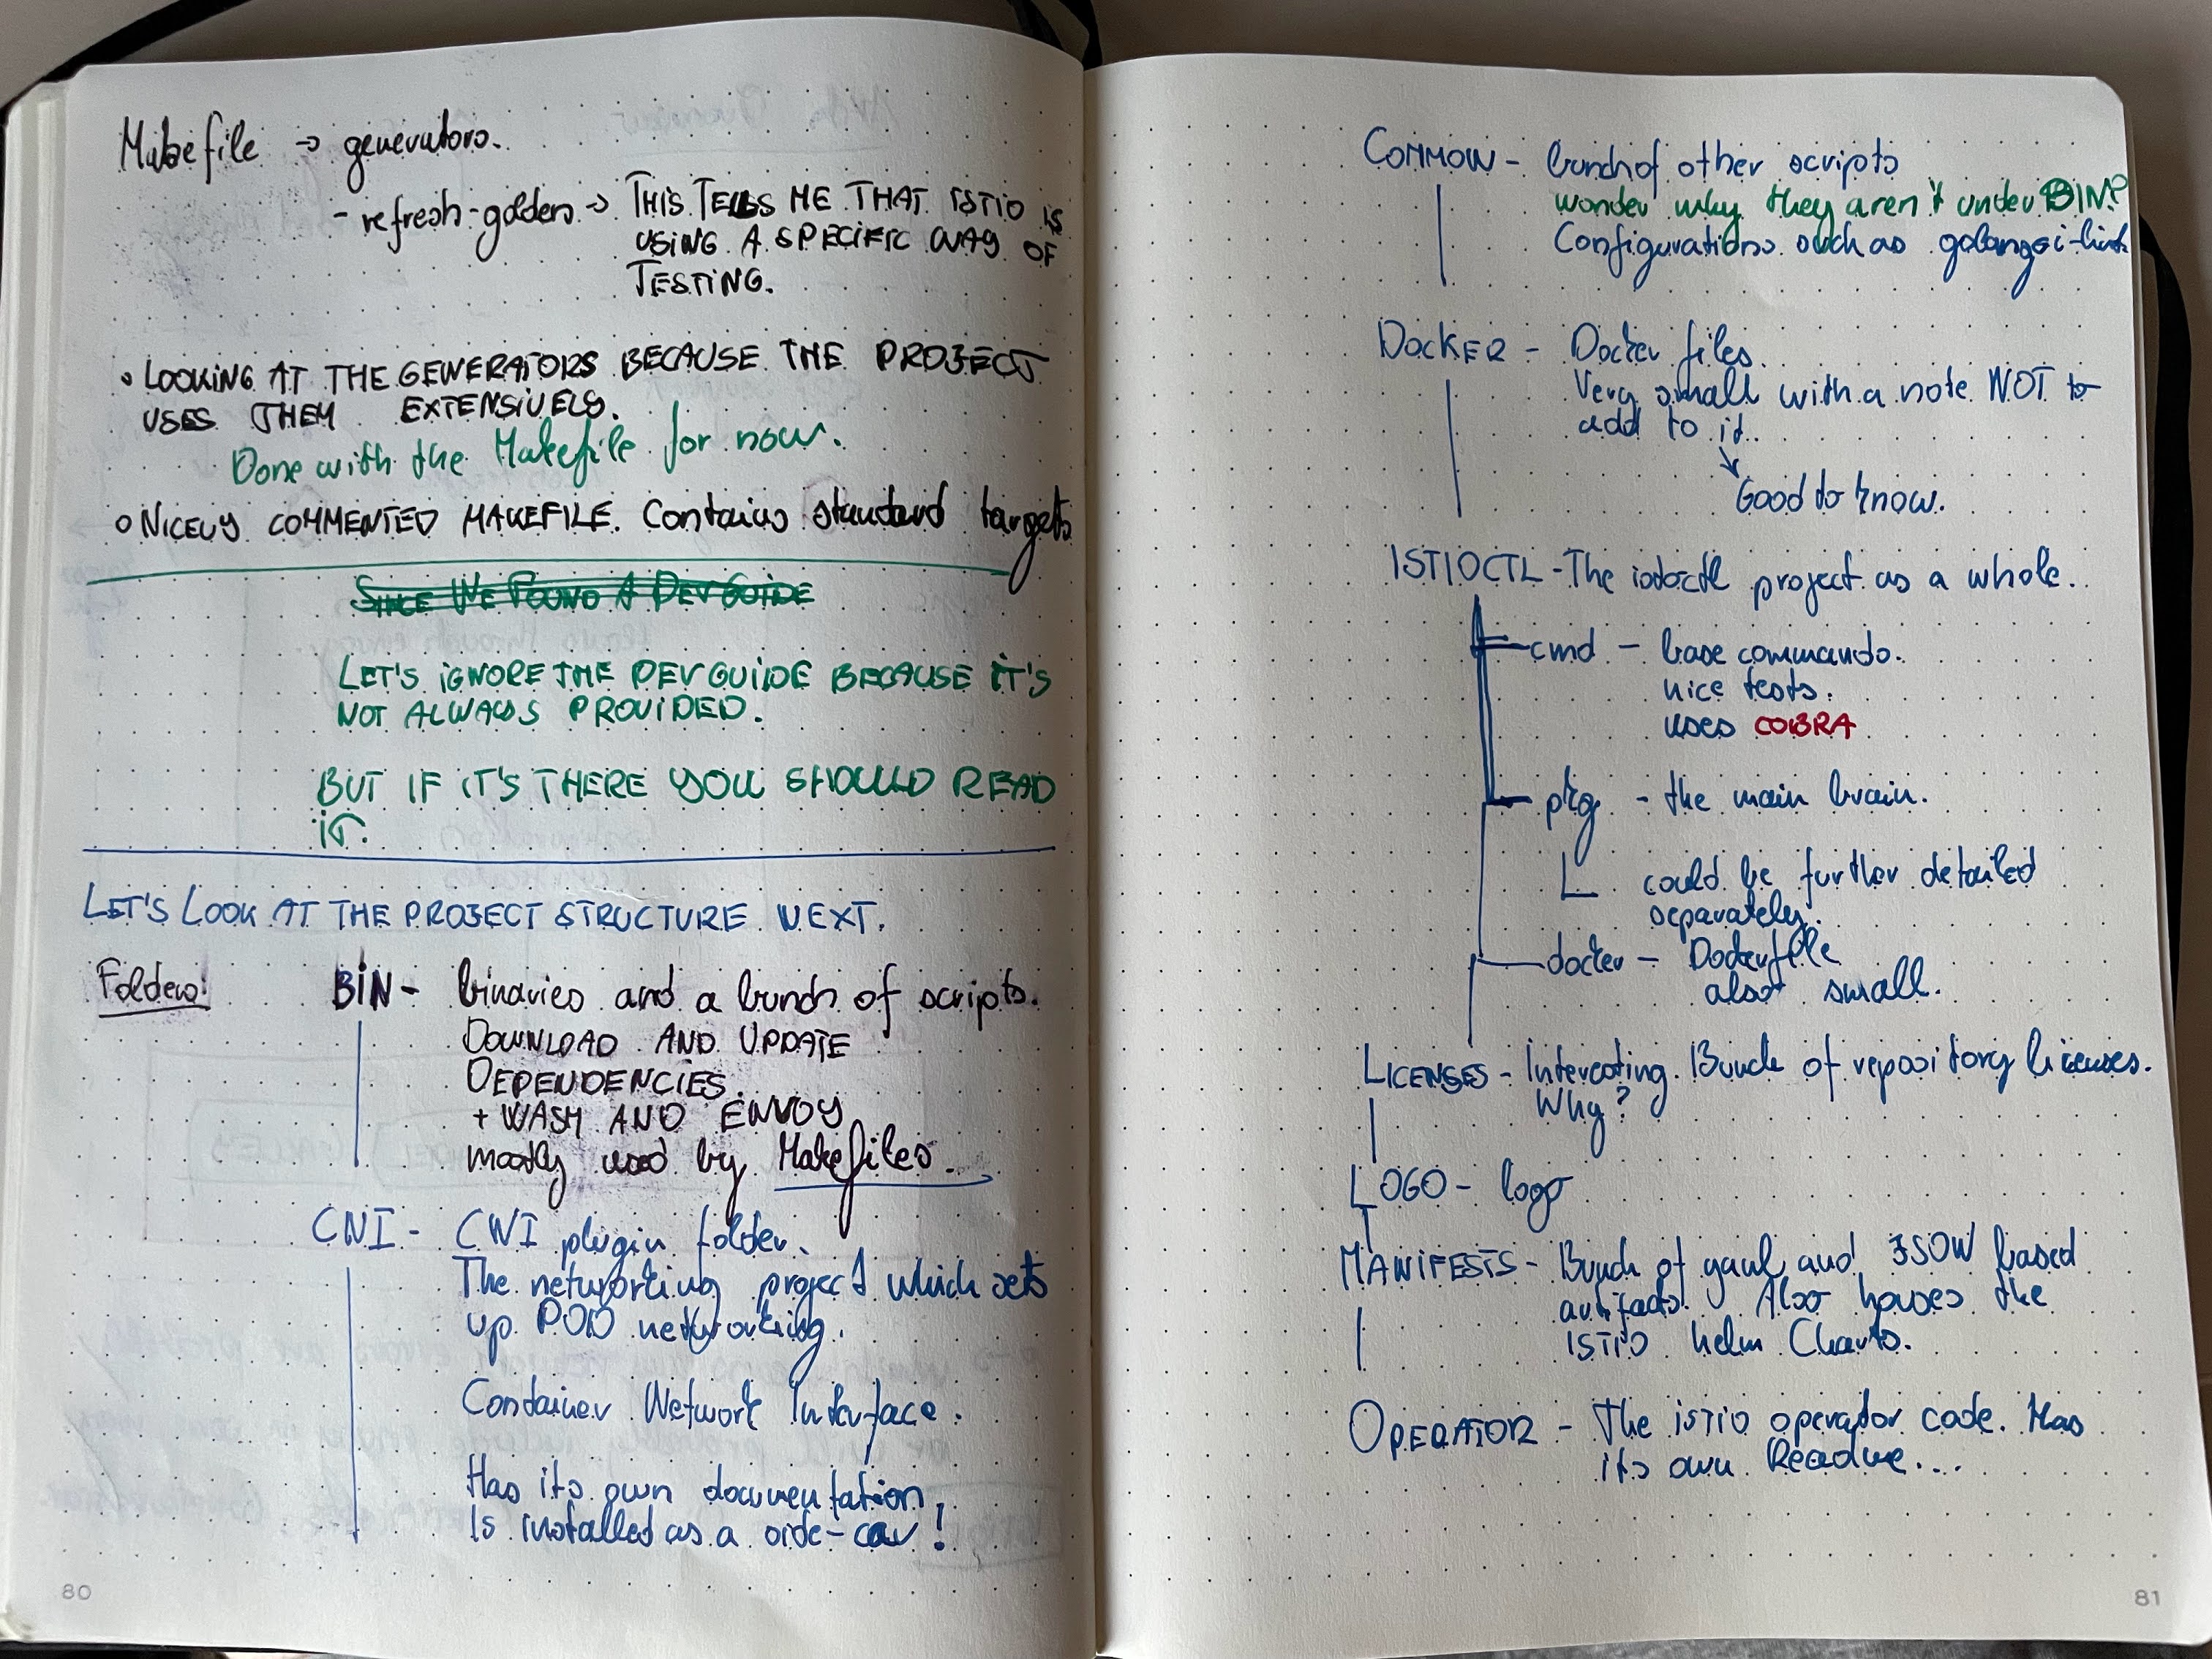
When I go through the folders I also note down possible locations for editing things. Like the cni folder which most
likely contains code I’m interested in.
Building and test environment
Next, how is the project built and set up? It’s not enough to understand the code. Eventually, I have to build and test what I wrote. Understanding how the environment is set up is crucial in understand how the whole thing works. Is it fully automatic, or does it require human interaction? Is it using containers? Does it have a Makefile? Does it have any other files? Manifest files, configuration, images, logo, static API documentation, sample codes… etc. There are so many things besides code that are interesting and can tell you much about the project itself.
Third party dependencies for example will tell you how many things you will need to get the project started. Does it have a dev guide? If not, can you write one? Often times, when I face a project which doesn’t have a dev guide but I have to/or want to work on it, I start with writing a dev guide while I’m trying to set it up and make it work first.
Once it’s working locally, I will start to either improve the dev process or convert my notes into a dev guide and contribute that back into the project.
Why bother with a local environment? Because feedback is the most important part of all of this. The feedback when writing code, by feedback I mean the time it takes to run the code and get back if it’s working or not, must be as quick as possible. No one likes waiting an hour just to find out that there was a typo in the code. Unit tests, manual tests must be fast coming. End-to-end tests are usually executed at the end of a dev cycle. They can, of course, lead to restarting the dev cycle but usually you don’t start out by running them.
Issues and Testing
Now, what to work on? You have a couple of choices. Improving documentation is always something that everyone will welcome. Why? Because writing docs is hard. Writing is hard. It takes effort and knowledge about the project. Dev guides are interesting and might actually be better written by someone outside the project because they won’t have project bias.
But if you don’t find any of this attractive and want to get your hands dirty, you might want to look through issues.
Usually, if a project is big enough and a maintainers nice enough, you’ll have issues with labels like Good First Issue
or Community Help Requested or Help Wanted. These are great places to start at. But more often than not, there are
either no issues or none that you have any particular interest in or nothing that you can actually work on because they
require background knowledge that you simply don’t have yet.
What do you do in these cases? You start following the code as a flow. Try understanding what it’s doing if you follow through a use-case step-by-step. Or, simply, improve the test coverage. I assure you that no project out there, or only a small percentage, will have test coverage above 60-70%. And even then I might be optimistic.
Take that on. The way I started writing Go is actually through improving the test coverage in Hugo and Go itself. Usually, test coverage PRs are also merged relatively fast, without too much hassle too. Thus it’s a good start to get your foot into the door.
Coding
Now that we have what we want, let’s get to coding. What I do first, before starting to code, is get to know the codebase.
Get to know what kind of conventions there are. How the code is written and what you have to follow to use the same
things. Look for interfaces, string formatters, even utils although I hate that package name. But still. Convenience
codes exist in every repo. Try reusing as much as possible.
If you find that the code is not up to standards, start refactoring. Don’t change behaviour, just simplify, reduce, refactor. Refactoring and simplifying can help you a lot in understanding what the code does, because you basically rewrite it.
Submitting a PR
Now that you have a bit of code even the smallest changeset will get you started in contributing to the project. Even if it’s a tiny bug fix it will get you started. I found that I sometimes think way too much about starting when in fact I should have just typed out a line of code or two and get to hacking. Just start writing for two minutes and get started! From there, things will come naturally.
Conclusion
I was planning on having this post a bit larger and actually working on an issue in Istio but I have a new project which requires a lot of time learning the ins and outs of so I can’t learn yet another project right now.. But I also wanted to get started on this blog post and do write some remarks as an extra.
Thank you for reading!
Gergely.